

Home > Blog > July 24, 2014 – White-Tailed Ptarmigan Chick, San Juan National Forest, Colorado, And The Capture One Realistic HDR Technique
July 24, 2014
White-Tailed Ptarmigan Chick, San Juan National Forest, Colorado, And The Capture One Realistic HDR Technique
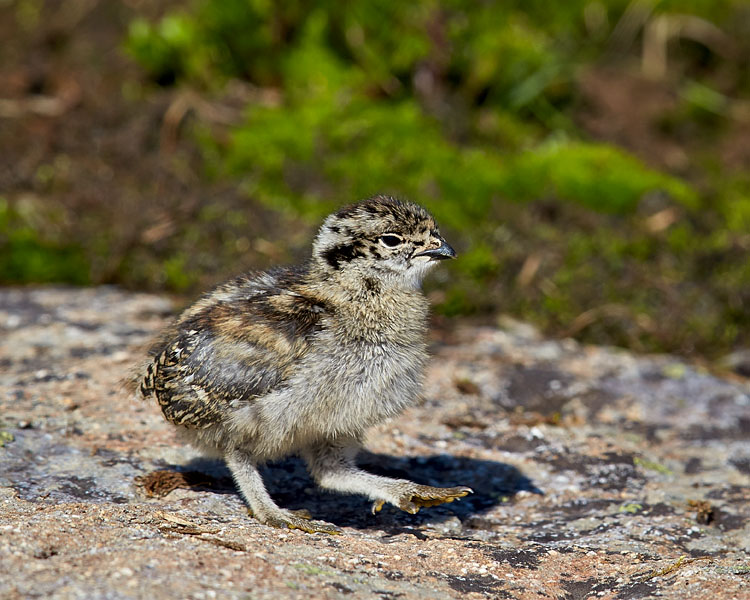
White-Tailed Ptarmigan Chick
San Juan National Forest, Colorado, USA
Canon EOS 1D X, 600 f4 IS II & 2x III, 1/500 sec, f8, ISO 400
Image taken on July 18, 2014.
The Capture One Realistic HDR Technique
I gave a presentation on my workflow to a group of photographers last night, and someone in the audience asked a perfect question when I was describing the Lightroom HDR technique: "Couldn't you use Capture One instead of Lightroom?" I had never thought of trying it, so I tried it this morning and it works! Capture One can operate on a 32-bit file and then process it to create a 16-bit file!So, for users of Capture One and Photoshop, here's a fantastic way to create a realistic HDR image:
- In Bridge, select the bracketed photo series RAW files, or already-processed TIFF files, then select Tools > Photoshop > Merge to HDR Pro…
- Wait for the images to load into Photoshop
- Click the "Remove Ghosts" box, set the Mode to "32 Bit", make sure "Complete Toning in Adobe Camera Raw" is off, then click "OK"
- Wait for Photoshop to create the 32-bit file
- Select File > Save As… and save a 32-bit TIFF file
- Select the 32-bit file in Capture One
- Use the Exposure, Highlight, and Shadow sliders to develop the file w/o worrying about the typical HDR tone mapping controls
- Be amazed by the natural-looking results!
- Process the image to create a 16-bit file
- Edit the 16-bit file as usual in Photoshop
Categories:
This particular blog entry is www.jameshagerphoto.com/blog/?date=2014-07-24. Visit www.jameshagerphoto.com/blog to view the latest blog entry, and you may click here to create a URL that you can bookmark to go to the latest blog entry.

