

August 26, 2012
Initial Hands-On Experience With The Canon EOS 1D X
I've had just a little time to play with and test my new toy, er sophisticated piece of photographic equipment, the Canon EOS 1D X.As background, I've been shooting with Canon EOS 1-series bodies since the 1v in the film days. Then I've had the 1D Mk II, 1Ds Mk II, 1D Mk III, 1Ds Mk III, and 1D Mk IV since converting to digital capture. The 1D models have been great for wildlife with the fast frame rate, large buffer, and 1.3x crop factor. The 1Ds models have been great for landscapes with the higher number of pixels and a full-frame sensor to take advantage of wide-angle lenses.
When Canon announced the 1D X, which combined the fast frame rate and large buffer of the 1D series with the somewhat high number of pixels (18.1MP compared to the 1Ds Mk II at 16.7MP and the 1Ds Mk III at 21.1MP) and a full-frame sensor of the 1Ds series I was intrigued. Add a completely new autofocus system, improved high-ISO performance, a vertical grip multi-controller, two CF cards, and a built-in level, and the body had lots of potential.
Ergonomics And Operation
Ergonomics
My first impression when taking the camera out of the box was that it was in fact a little heavier than the previous bodies (the 1D Mk IV and 1Ds Mk III) at 47.3 oz (1341 g) versus about 42 oz (1191 g). The next thing I noticed was the redesigned grip is uncomfortable. The grip of the 1D X is really squared off on the lens side and isn't nearly as comfortable to me as the more rounded grip of the previous models. The eye-piece shutter lever is really hard to operate because it's now recessed slightly instead of protruding slightly. The rubber cover for the system extension terminal is held in place by a protruding hinge that digs into the fleshy part of my thumb when handholding the body in a vertical orientation with a short lens attached. If I decide to use this body for landscape work, then an L-bracket will likely keep that torture device away from my hand. When I first looked through the viewfinder and tried changing AF points, I was shocked that the whole focusing screen had a pink tint.Yes, most of my initial impressions weren't exactly favorable. The vertical-grip multi-controller is a nice addition though.
Buttons
A lot of the buttons can be customized by the user. It's almost like the designers said, "We can't figure out the best way to make this work, maybe the users can." Unfortunately, not every button can be set to control any function. For example, I'd like to use the AE lock button to turn on and off the rear LCD level, but that's not an option. It is possible to turn off the AE lock button, so I'll never have to deal with a "locked camera" if I inadvertently hit it like I've done in the past.I really like the capability to use the Set button to set the ISO because I can push it with the tip of my thumb to get into the ISO set mode, then I can use the center of my thumb to operate the surrounding quick control dial to select the ISO I want, and then I can use the tip of my thumb to push the Set button again to register the setting. That's exactly how I have my 1D Mk IV set up too. However I usually have the Set button of my 1Ds Mk III configured to turn Live View on and off because there's a shortage of buttons on the old bodies. The 1D X has a dedicated Live View button which means that I can leave the Set button assigned to setting the ISO.
The Quick Control Button (Q button) is an odd addition. I have been using the Info button to display essentially the information from the top LCD panel, and the Q button does almost the same. However, the Q button doesn't show the battery level, whether mirror lockup is on, or the number of frames that remain. So for now, I'm still using the Info button. I've also programmed the Info button to show the level on the rear LCD screen. The level is really cool to have because I no longer have to mess with a triple-axis hot-shoe mounted level. When I was shooting grand landscapes with wildflowers recently, I would mount the level, compose the shot, then switch to my Shoot RC-300 RS-80N3 Wireless Remote (the receiver mounts to the hot shoe). Now I'll be able to use the built-in level and the Shoot Wireless Remote at the same time. Unfortunately, the Info button now cycles between the level, the top LCD information, and off, so it's no longer quite as easy to quickly check the top LCD information and then turn off the display.
I haven't figured out what to do yet with the Multi-function button 2 which is next to the redesigned depth-of-field buttons. I might be able to use it to help select AF points.
The blue "+" and "–" buttons for zooming in Live View or image review are gone. In Live View, pushing the magnifying glass button cycles between the magnifications, and in image review, the front main dial is used to zoom in and out. It'll take a while for this new mode of operation to become second nature, but I think it's a better way to work the zoom controls.
Autofocus Area Selection
The autofocus area selection has been complicated because there are more modes to choose from than in previous bodies. There is now:- Single-point spot AF, a smaller point than the old standard
- Single-point AF, the standard single-point mode
- AF point expansion 1, that takes the above/below and left/right points into account
- AF point expansion 2, that takes all surrounding points into account
- Zone AF, where points are grouped into nine different zones for automatic selection
- 61-point automatic selection AF, where all 61 AF points are available for automatic selection
Image Quality
When you finally get beyond all of the ergonomic and operation changes and actually take some pictures, are all of the changes worth it? After all, the whole point of having a camera body is to capture those pixels.All of the following comparison images were photographed from a tripod with the eye-piece shutter closed, mirror lockup on, and a 2-second self-timer. They were captured in RAW and processed through Capture One with no contrast, brightness, saturation, or clarity changes during conversion. The high ISO images were focused using AF before the first exposure, then the lens was switched to manual focus to hold focus, and the bodies were swapped without changing focus. The resolution images were focused using Live View before the first exposure, and the bodies were swapped without changing focus.
High ISO
The first thing I did was evaluate high-ISO noise. High-ISO is relative, and I don't like noise. Lately with the 1D Mk IV, I've been going to ISO 640 if I had to and ISO 800 if I really had to. Based on my initial tests, the 1D X has about a 1.5-stop increase in usable ISO. In other words, the noise at ISO 1600 with the 1D X is about the same as the noise at ISO 500 or 640 with the 1D Mk IV which is great news.While doing the comparison shots, I also noticed something extremely interesting. The following are two unadjusted images from the ISO test, straight out of Capture One, and it looks like a comparison of Kodacrome and Velvia! The image from the 1D Mk IV is rather flat and the image from the 1D X is juiced up. Part of the difference is the AWB (auto white balance) which the 1D Mk IV set Kelvin to 6747 and Tint to 1.1 and the 1D X set Kelvin to 7466 and Tint to -0.9. You can also see the effect of loosing the 1.3x magnification factor: the two images were taken from the same location and with the same focal length. The composition was selected to have a subject with some detail (the tree just right of center) separated from a moderate background with some detail (trees on the other side of the road) and distant background with virtually no detail (the mountain).
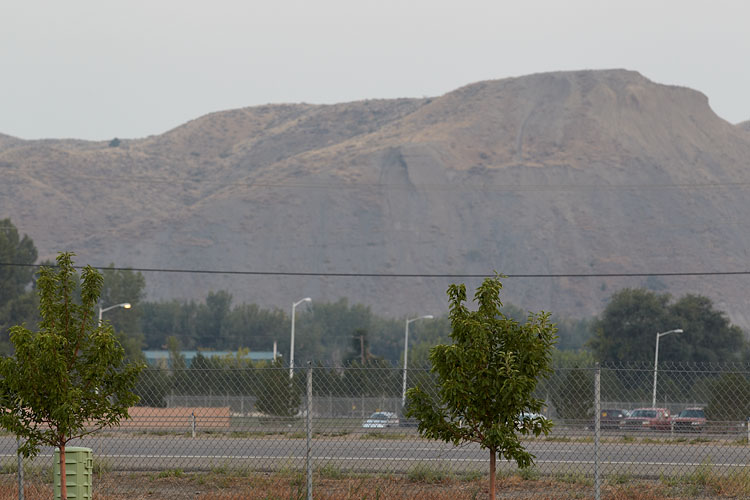
ISO Test Image, 1D Mk IV
Canon EOS 1D Mk IV, 70-200 2.8 IS II (at 200mm), 1/10 sec, f8, ISO 200
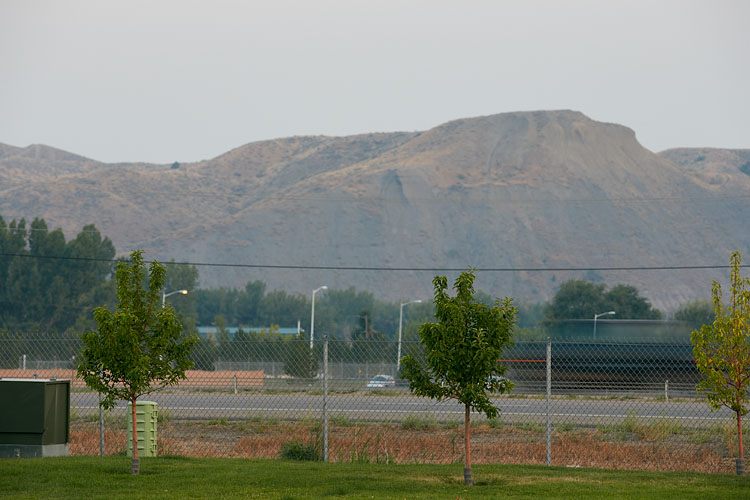
ISO Test Image, 1D X
Canon EOS 1D X, 70-200 2.8 IS II (at 200mm), 1/10 sec, f8, ISO 200
Resolution
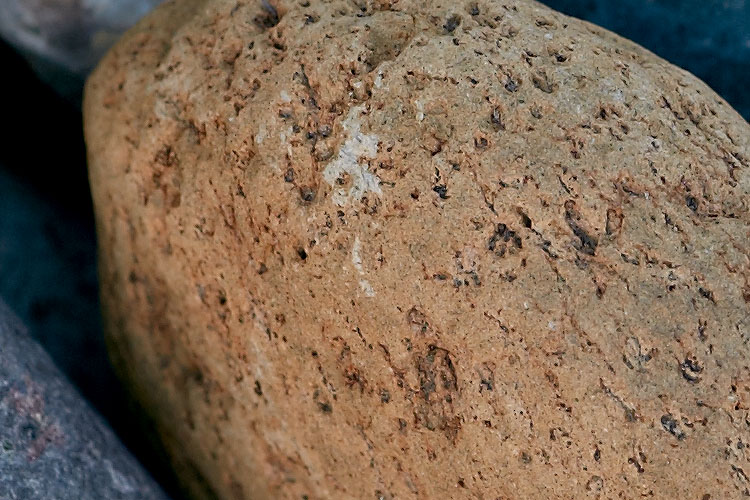
The next thing I did was evaluate the resolution available with the 18.1MP sensor of the 1D X compared to the 21.1MP sensor of the 1Ds Mk III. The following two images show the whole capture. In Capture One, I set the white point to the same Kelvin and Tint, but the colors are still different. Then I adjusted the exposure so the two images have about the same brightness. Then I processed them through Photoshop, including my Silver Efex Pro layer for luminosity, like I would do for any image, but I used the same settings for both images. I prefer the look of the 1Ds Mk III image, especially for the light rock in the upper left corner, but that may be because I used that as the reference image for the settings used in Photoshop and Silver Efex Pro.
Resolution Test Image, 1Ds Mk III Full Image
Canon EOS 1Ds Mk III, 180 Macro, 1/8 sec, f8, ISO 100

Resolution Test Image, 1D X Full Image
Canon EOS 1D X, 180 Macro, 1/6 sec, f8, ISO 100

Resolution Test Image, 1Ds Mk III As Captured
Canon EOS 1Ds Mk III, 180 Macro, 1/8 sec, f8, ISO 100
Resolution Test Image, 1D X As Captured
Canon EOS 1D X, 180 Macro, 1/6 sec, f8, ISO 100

Resolution Test Image, 1Ds Mk III Center Of 20x30
Canon EOS 1Ds Mk III, 180 Macro, 1/8 sec, f8, ISO 100

Resolution Test Image, 1D X Center Of 20x30
Canon EOS 1D X, 180 Macro, 1/6 sec, f8, ISO 100
Initial Conclusions
Is the 1D X really the one camera to rule them all? Maybe. So far I've determined that the 1D X isn't a lemon and I won't be selling it right away. The high-ISO performance and acceptable resolution are plusses, but I need to look into the Velvia effect and perform some real-world autofocus testing to compete my evaluation.Addendum
See the blog entry for August 28, 2012 for more about the "Velvia effect" and the blog entry for August 29, 2012 for a further review.Categories:
This particular blog entry is www.jameshagerphoto.com/blog/?date=2012-08-26. Visit www.jameshagerphoto.com/blog to view the latest blog entry, and you may click here to create a URL that you can bookmark to go to the latest blog entry.

